
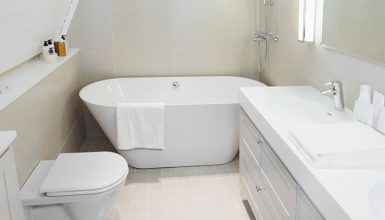
Welcome to our tutorial on how to repair a crack in a fiberglass tub! If you’re reading this, chances are you’ve got a crack in your tub that’s been bugging you for far too long. Maybe it’s not even a big crack, but it’s still noticeable enough that you want to get rid of it.
Whatever the case may be, you’re in luck because we’ve got the perfect solution for you. In this tutorial, we’ll walk you through the process of repairing a crack in your fiberglass tub, step by step. So let’s get started!
Types of Cracks in Fiberglass Tub
Several types of cracks can occur in a fiberglass bathtub. These include:
1. Stress cracks
These are thin, shallow cracks that occur due to stress on the fiberglass material. Stress cracks are usually caused by weight being applied to the tub, or by the tub being subjected to extreme temperature changes.
2. Surface cracks
These cracks occur on the surface of the fiberglass and are usually caused by impact damage or by the tub being subjected to harsh cleaning chemicals.
3. Structural cracks
These are deeper, more serious cracks that can compromise the integrity of the tub. Structural cracks can be caused by a variety of factors, including impact damage, improper installation, or the tub being subjected to extreme loads.
4. Hairline cracks
These are thin cracks that may not be visible to the naked eye. Hairline cracks can be caused by stress on the fiberglass material, or by the tub being subjected to extreme temperature changes.
Assessing the Crack
Depending on the size and depth of the crack, you may be able to fix it yourself with a simple fiberglass repair kit, or you may need to call in a professional.
Now, let’s take a closer look at the crack. Is it small and shallow, or is it large and deep?
A small crack can usually be easily repaired with a fiberglass repair kit. On the other hand, large, deep cracks may require more extensive repair work and may be best left to a professional.
Another thing to consider is the location of the crack. Is it in an area that gets a lot of wear and tear, like the bottom of the tub where you stand when showering? If so, it may be more prone to further damage and may need to be repaired by a professional.
Repair Kit and Tools
Now that you’ve assessed the damage and determined the best course of action for repair, it’s time to gather the materials and tools you’ll need to get the job done.
First and foremost, you’ll need a fiberglass repair kit. These kits can be found at most hardware stores or online. And usually include a repair compound, some fiberglass mesh, and instructions on how to use them. Make sure to read the instructions carefully and follow them to the letter to ensure a successful repair.
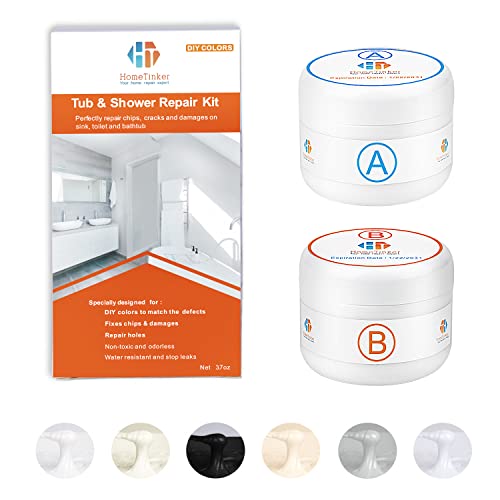
- FIBERGLASS REPAIR KIT – Repairs chips, scratches, dents, worns and holes . Works on fiberglass, acrylic, ceramic, porcelain, gel-coat, enamelled steel and enamelled cast iron .
- PEFECT COLOR MATCH – Matchs for white, arctic, milk white , dune, biscuit,bisque, almond, linen, bone, sandbar, ice gray, cashmere, thunder grey and black . Our product Repaired without trace. You don’t needs to add other paint on the surface
- NON-TOXIC AND ODORLESS – Our fiberglass repair kit use nanotechnology,ReallySAFE for children and pets
- 5-YEAR DURABILITY GUARANTEE – It provides great adhesion in a few simple steps. Water resistant and stop leaks.
- 60-DAY FULL REFUND GUARANTEE – If you are not satisfied with the our products, return it for a full refund within 60 days .
In addition to the tub repair kit, you’ll also need a few other tools to help with the repair process. These may include:
- Sandpaper
You’ll need this to rough up the edges of the crack and create a rough surface for the repair compound to adhere. - Putty knife
It will come in handy for smoothing out the repair compound and shaping it to match the surrounding surface. - Masking tape
It can be used to create a straight edge for the repair compound and help achieve a seamless repair. - Wet/dry sandpaper
You’ll need this to smooth out the repaired area and blend it in with the surrounding surface. - Protective eyewear
As mentioned earlier, it’s useful to protect your eyes from any flying debris or sharp edges. - Gloves
Wearing gloves will help protect your hands from the rough edges of the crack and the repair compound.
Preparing the Area for Repair
Now that you’ve gathered all the necessary materials and tools, it’s time to prepare the area for repair.
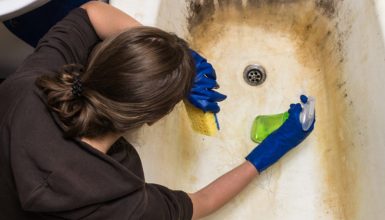
First things first, you’ll need to clean and dry the area around the crack. Use a mild detergent and a soft cloth to gently clean the area, being careful not to scrub too hard and cause further damage. Once you’ve cleaned the area, be sure to dry it thoroughly. Any moisture left behind could cause the repair compound to fail.
Next, you’ll need to prepare the edges of the crack. Use medium grit sandpaper to rough up the edges and create a rough surface for the repair compound to adhere to. Be sure to sand around the crack, including the underside if it’s visible.
Depending on the size and depth of the crack, you may also need to apply a bonding agent to the edges of the crack. It will help the repair compound adhere more securely and create a stronger repair. Follow the instructions on the bonding agent for the best results.
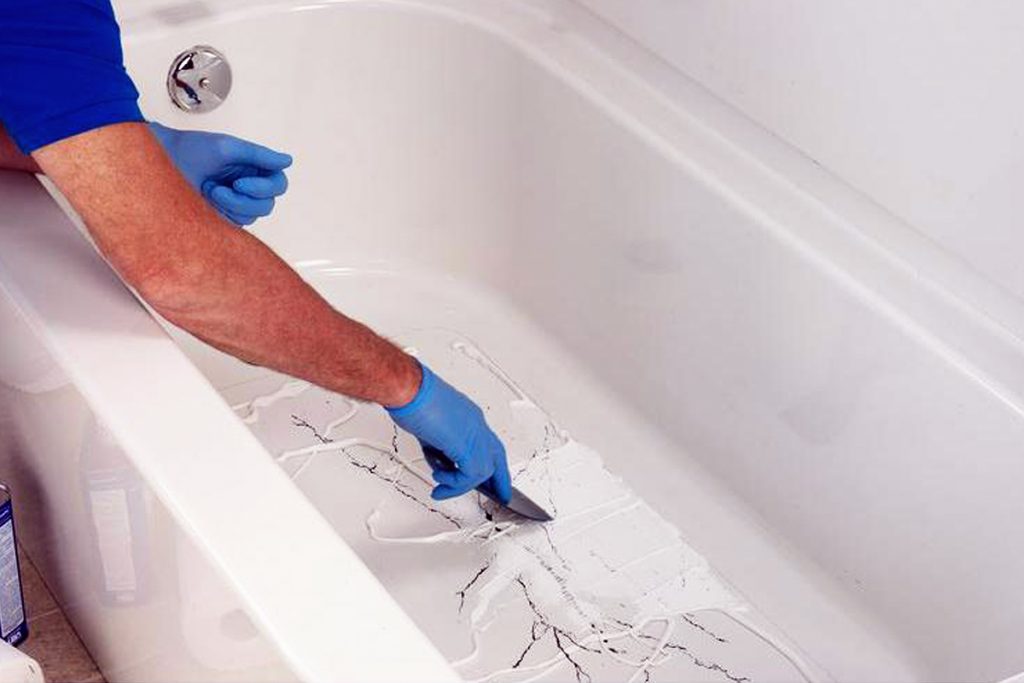
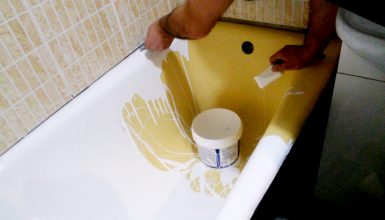
Repairing the Crack
Follow these steps to get a seamless repair of your tub.
Step 1
Mix the repair compound according to the instructions on the repair kit. You’ll want to work quickly, as the compound will begin to set within a few minutes.
Step 2
Apply the repair compound to the crack using a putty knife or similar tool. Be sure to fill the crack, using the putty knife to shape and smooth the compound as you go.
Step 3
Once the repair compound is applied, use a wet finger to smooth out the surface and blend it in with the surrounding area. It will help create a seamless repair.
Step 4
Allow the repair compound to set according to the instructions on the package. This may take anywhere from a few hours to a full day, depending on the specific product you’re using.
Step 5
Once the repair compound is fully set, use a wet/dry sandpaper to smooth out the repaired area and blend it in with the surrounding surface. Be sure to sand evenly and gently to avoid damaging the repair.
Step 6
Wipe away any dust or debris created during the sanding process, and you’re all done!
Finishing Touches
Now that you’ve repaired the crack in your fiberglass tub, it’s time to give the repaired area some finishing touches to make it look as good as new again.
First, you’ll need to sand the repaired area to smooth out any rough edges and blend it in with the surrounding surface. Use wet/dry sandpaper and sand evenly, being careful not to apply too much pressure and damage the repair. Once you’ve sanded the area to your satisfaction, wipe away any dust or debris created during the process.
Next, you’ll need to match the color and texture of the repaired area to the surrounding surface. If the repair compound is a different color than the rest of the tub, you may need to apply a matching touch-up paint. Follow the instructions on the paint for the best results, and be sure to allow the paint to dry fully before using the tub.
If the texture of the repaired area is different than the surrounding surface, you may need to use a non-slip mat or apply a non-slip coating to the area. This will help prevent accidents and make the tub safer to use.
Finally, it’s important to maintain the repaired area to ensure it stays looking its best. Avoid using abrasive cleaners or scrubbers on the repaired area, as these can damage the repair and cause it to fail. Instead, use a gentle, non-abrasive cleaner and a soft cloth to keep the area clean.
Conclusion
Congratulations! You’ve successfully repaired the crack in your fiberglass tub. We hope our tutorial was helpful and that you now feel confident in your ability to tackle this repair yourself.

