
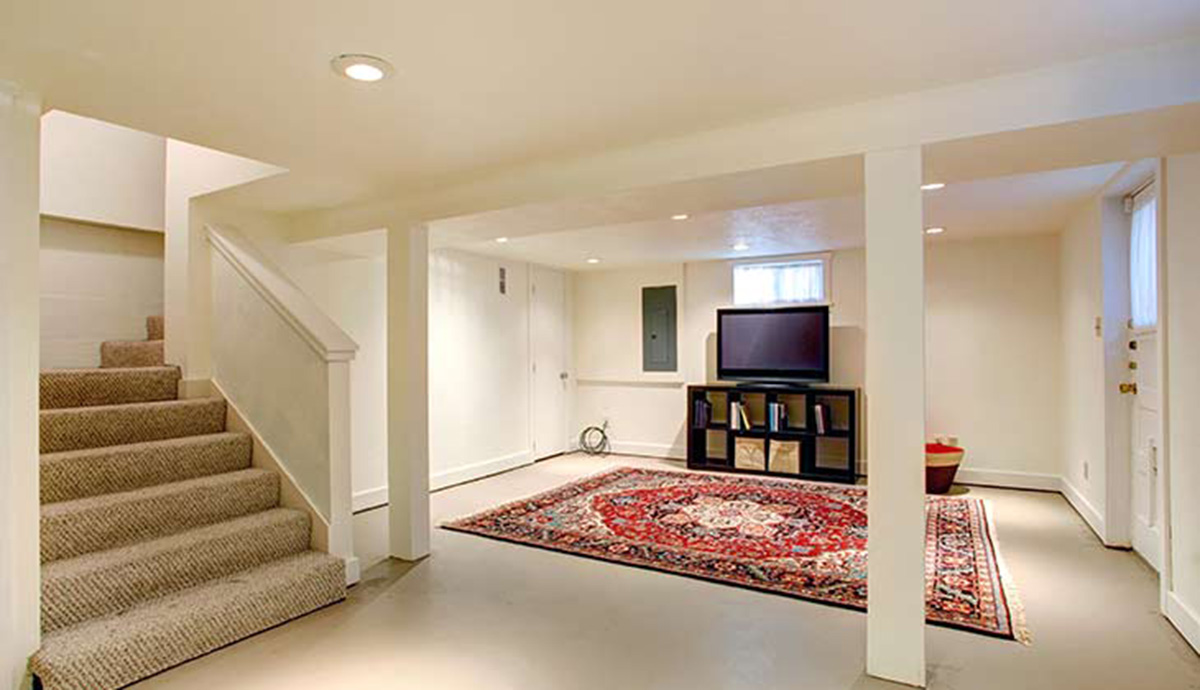
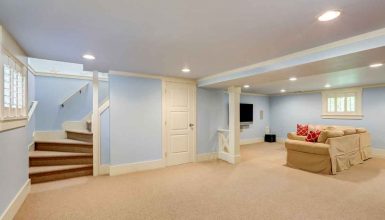
If you think your basement flooring has seen better days, then an epoxy paint can change all that. The good thing about this project that it’s relatively cheap.
This is especially true as you don’t need to hire a contractor. It’s a project that can be done in a single weekend. Furthermore, you don’t need specialized equipment. Perhaps the only advanced tool you may need is a paint brush and roller.
In this article, you will learn about epoxy paint for basement floor, a step-by-step guide on how to do the project, the recommended kits, and more.
Best Epoxy Paint for Basement Floor


1. Rustoleum Epoxy Shield Basement Floor Kit
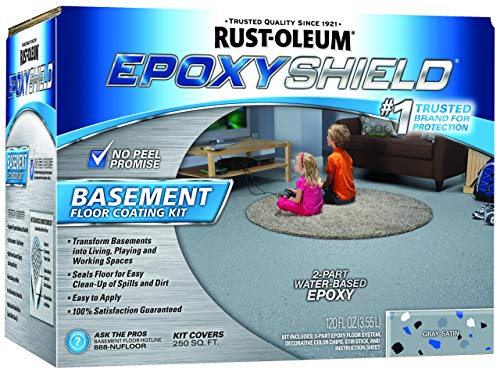
The thing that is remarkable about this kit is the value it offers. For one, it’s the most affordable option in this list. And yet, it doesn’t mean that it is a lackluster product. It’s far from it.
The kit provides you with enough product to cover about 250 square feet. You really don’t need a lot as a single coat is enough. That also means that it’s not time-consuming to apply compared to other products that require multiple coats. As a bonus, you don’t’ need to spend money buying a primer because it doesn’t need one.
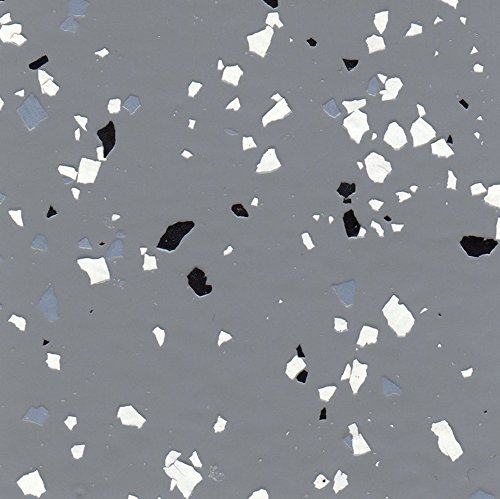
The formula also cures into a hard and durable surface. It can resist abrasions, stains, and wear. The final result also produces a beautiful satin finish.
Another thing that’s worth mentioning is that the formula is water-based. Hence, it’s low odor. This is something that you’d want because enclosed spaces (e.g., basement) can amplify the harsh and chemical smells of non-water-based formulas.
The coating is also low maintenance. To clean it, there’s no need to follow strict guidelines so that you won’t damage it. In fact, you can clean it with soap and water.
When it comes to downsides, there are only a few. The most glaring issue is that the formula is highly recommended for indoor use only. The color is also clear, which can be too dull for some users.
Pros
- Easy to apply
- Water-based formula – it’s safer and low-odor
- Satin finish – beautiful and classy
- 250 square feet coverage – there’s enough product to cover a typical basement
Cons
- Dries pretty fast
2. Supercoat Stone Epoxy Floor Coating
This kit produces not only a breathable coating but also an aesthetically pleasing result.
The first thing to know about this kit is that the coating is breathable. This means that it allows vapors and moisture to pass through. As a result, it significantly decreases the occurrence of unsightly peelings and blistering. On top of that, it creates an anti-slip aggregate that makes it safer for everybody.
The coat itself is very durable. It’s resistant to hot tire lift and automotive fluids. It also adheres pretty well to wood and concrete.
Speaking of adhesion, there’s no need for mechanical preparation or acid etching to apply the product. In most cases, you only need a degreaser, which is already included in the kit. Mix and apply the product. After that, you scatter the flakes and wait for it to cure.
The flakes give it a unique and lovely look. It goes especially well with modern and minimalistic themes.
While its unique look is excellent, it’s also a downside. It means that you need to take more steps to complete the project. Also, the distribution of the flakes to make it look good requires a bit of art.
Pros
- Breathable – you can expect a very minimal occurrence of peeling and blistering
- Decorative flakes – beautiful and modern-looking
- Anti-slip aggregate – contributes to a safer environment
Cons
- Needs more steps to complete
3. Coloredepoxies Epoxy Resin Coating

If you want a coating that is slightly colored with plenty of color options, then this one is an excellent option. The formula cures into a 100% solid surface that’s mostly clear but with a hint of color tone.
The coat is also flexible, so it moves with the slight shifts of the flooring. It’s odorless, and that means it has no chemical smell even after it’s newly applied and cured.
It’s sold by the gallon, and it can coat around 125 to 175 square feet on a single can. As a bonus, the coating is waterproof. Hence, it can protect the flooring below from moisture damage. For the same reason, it’s mildew and mold resistant.
The coating is flexible so you are not limited to concrete applications. You can use it on plywood and bar tops as well.
Not only the final result is aesthetically pleasing, but it’s also durable. The product cures into a super high gloss layer, which gives off a high-class look. Despite being beautiful, it’s hardy as it’s abrasion-resistant and impact resistant.
If there’s a downside to this kit, then it has to be that it’s not water-based. It’s still odorless and free from volatile organic compounds. Hence, it does not come with the usual strong chemical smells of non-water-based products. It’s also good to know that it’s free from volatile organic compounds that are known to cause serious health issues if one is subjected to prolonged exposure.
Pros
- Colored – the slight coloration may be attractive for some people who consider clear color as too dull
- Odorless – doesn’t come with a strong chemical smell
- No volatile organic compounds – minimizes health issues
Cons
- Non-water based
Benefits of Epoxy Paint for Basement Floor
- Protection from Moisture
Epoxy is waterproof. This means it has the ability to protect the flooring beneath it from water and moisture. Waterproofing is essential if your basement floor is always damp because mold and mildew will begin thriving in it.
Epoxy paint is a great option as well for protection against leaks and spills. It can help in preventing massive amounts of water and moisture from seeping through your home’s concrete foundations, keeping potential damage at a minimum.
Unlike wood, basement floor epoxy does NOT warp even in a damp environment. Therefore, you have nothing to worry about with poor ventilation that may cause basement flooring to buckle. Regardless of whether the condition or environment is wet or dry, you’ll be able to enjoy your basement as an epoxy floor can cope with a broad range of levels of humidity.
- Strength and Durability
Distinctly valued for its durability and strength, an epoxy basement floor has a longer lifespan compared to almost all other types of basement flooring.
Concrete is perhaps the only flooring material that can beat epoxy; however, it has to be sealed and maintained properly. Take note: epoxy floor coating needs concrete underneath it. An epoxy coat renders concrete floors exceptionally durable.
- Decorative
Epoxy basement flooring is very practical; however, that doesn’t mean it lacks aesthetic quality. Most homeowners choose epoxy basement flooring from its attractive appearance.
An epoxy floor comes in several different styles and colors, which means you can match the shade and pattern of your floor to your basement’s overall design.
- Easy to Clean and Maintain
Epoxy floors are easy to clean and maintain as they’re highly resistant to almost everything from gasoline, bleach, and oil to cleansers and transmission fluid. Their resistance is one of the many reasons why they’re so frequently found in basements and garages.
Besides withstanding cleaners or chemical spills, the smooth, even surfaces of epoxy floors make them easy to sweep. Not much sticks with this kind of flooring either, so cleaning messes is easy.
How to Apply a Basement Epoxy Floor Paint
- Step 1: Prepare and Clean the Surface
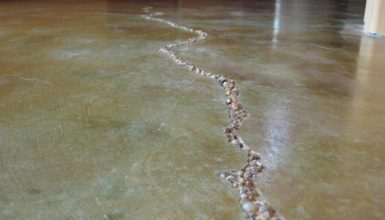
The first step is to clean the surface thoroughly. You have to wash the floor with soap and water. Then, you’d want to use a scraper to scrape off fine materials that may have stuck on the floor. Let the floor dry and do a lot of vacuuming after that. To know if you’re ready to move on to the next step, do a tape test.
To do a tape test, place a strip of tape on the floor. As you rip off the tape, you’d want good resistance. This means that the tape is sticking to the floor very well. If you can rip it off easily, that means that there are plenty of fine dust, dirt, and other materials that are sticking to the tape. This is the reason why the tape won’t have a lot of resistance when you take it off.
If this step seems to take a lot of time, don’t worry about it. This is the most time-consuming part of the project. In most cases, you will spend at least three times the amount of time cleaning compared to applying the coat.
- Step 2: Masking Edges
To make sure that the coat doesn’t go to places that you don’t want, you have to apply tape.
It’s highly recommended that you use a painter’s tape. The reason for this is because it is easy to take out, and it doesn’t leave a residue, unlike a masking tape. Also, a painter’s tape is easily recognizable as it’s usually colored blue.
When applying the tape, you have two options. You can tape alongside the bottom-most part of the wall. If you do this, only the floor will be coated. Or, you can do the other popular option.
You can do a floor trim if you think it could increase the aesthetics. If you do this option, this means that the floor and trim should be the same color. Hence, you’d want to start taping a couple of inches above the floor.
For example, you’d want a 10-inch trim. The best way to do it is to go to the one corner of the wall and measure 10 inches from the floor, and then place a mark. Go to the opposite corner of the same wall, and also measure 10 inches from the floor and mark it. Take a piece of string and connect the two marks.
The string will serve as a guide for your masking to ensure that your trim will be as straight as possible.
- Step 3: Mix Epoxy Coating
This step is probably the easiest and fastest. All you need to do is mix the formulas. In most cases, you need to mix two products together. Be sure to check the user’s guide provided by the manufacturer to ensure that you are incorporating the right products at the right amounts.
Once you have the combined the needed products, make sure that you mix it very well. You can use an applicator stick as a stirrer, but only if you are mixing relatively small amounts.
Generally, you’d want to stir the formulas together for three minutes non-stop. However, you still want to check the user’s manual for the recommended mixing time to ensure you get the best results.
- Step 4: Paint the Epoxy
The next step is to apply the epoxy. For this step, you should have both a paintbrush and roller.
The most important thing to keep in mind in this step is to plan your pathing. If you don’t plan your pathing, you might end up in one corner and surrounded by a newly painted epoxy surface. At this point, you’re stuck.
In order for you to get out, you’ll have to risk damaging the epoxy coating. Hence, plan ahead to avoid this easy-to-make mistake.
As mentioned above, you’d want to use both a paintbrush and roller. For painting edges, you’d want accuracy, and a roller is not the best tool for that. Thus, you use a paintbrush. Also, it’s best that you work on the edges first and then move on to coating the middle parts.
For the middle parts, you shouldn’t be so concerned about accuracy. Hence, the best tool is the roller. With it, you can cover more space in less time. It’s all about being efficient.
- Step 5: Adding Texture Flakes
This step is not necessary for all kits. If your chosen kit doesn’t have flakes, then you can skip this part. For kits that have flakes, this is the best time to sprinkle it around.
When spreading the flakes, one crucial thing that you need to be aware of is the size of the area and your access to some parts. Keep in mind that there’s a limit to the distance that you can throw or sprinkle the flakes.
It is not a big deal if the area is small, and you can comfortably sprinkle from one end, and it will reach the other end. Your problems start if you can’t do this.
Just imagine a square room with only one entrance. Now you have coated the floor up to the exit. You go grab the flakes, and it turns out you can’t sprinkle and reach the other side of the room. You see the problem here?
If the room is large and you have limited access, then you will have to do some alternating between painting the epoxy and sprinkling the flakes. Your goal here is to evenly sprinkle the flakes in all areas of the surface you want to coat.
Once you are done sprinkling, you can move to the next step.
- Step 6: Finish
After sprinkling, let the epoxy to cure fully. After that, you are mostly done. While most epoxy coatings don’t need a finish, you still have the option if you want one. If you decide to use a finish, then this is the time you want to apply it. After the finish is also cured, then you are done. All you need to do is clean up.
Things to Keep in Mind
If you are mixing a product that totals to more than a gallon, you should use an electric mixer to combine the parts thoroughly.
Do not mix parts that are made from a different company. The formula is different, and it may not work.
Be mindful of the expiration date. Don’t assume that it’s not food, and the expiration date doesn’t matter. It does.
FAQs
How long does epoxy basement floor last?
Are epoxy basement floors cold?
Does the basement epoxy coating have a strong odor?
How long does epoxy basement floor take to dry?
Can you apply epoxy over a painted basement floor?
Conclusion
As you can see, adding a new coating to your basement floor is not only inexpensive, but it is also uncomplicated.
Of course, the first thing you need to do is buy a kit that is to your liking. Then, you can do all the cleaning on day one, and all the application on day two. From then on, it’s just a matter of allowing the epoxy coating to cure.
It’s an easy project that almost anyone can do. If you can operate a paintbrush and roller, then there’s hardly any reason why you can’t accomplish such a project.
