
Basement wall cracks are caused by various reasons, including mistakes in pouring or mixing concrete, shifting foundation, and leaks. Fortunately, basement wall cracking isn’t difficult to address because there are many repair kits available on the market.
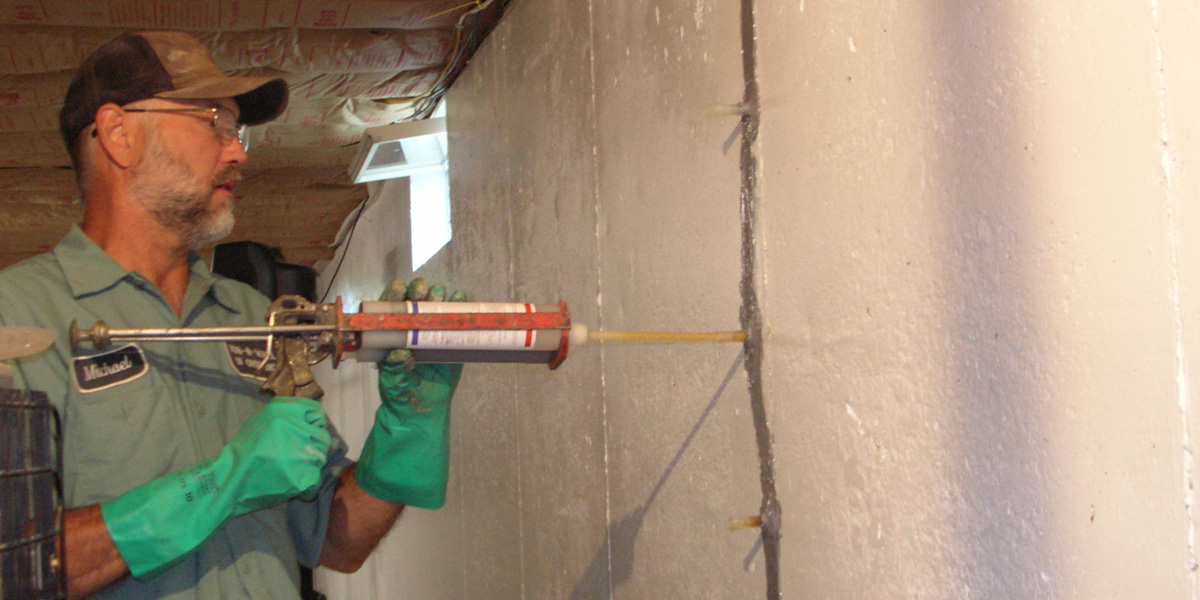
The best way to repair cracks in concrete basement walls is by injecting them from the inside. Repair is often quick and inexpensive. The process only involves polyurethane or epoxy injected into the cracks.
We’ve listed the best basement wall crack repair kits below to help you make an informed buying decision. Check them out!
The 5 Best Basement Wall Crack Repair Kit
1. Emecole DIY Leaking Basement Wall Crack Repair Kit
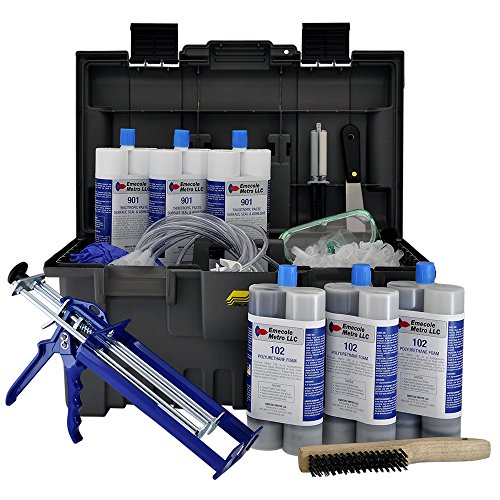
If you are looking for a kit that has everything you need, then this may be the one for you. The star of the show is the formula, which the company calls it the Emecole Metro 102 Premium Polyurethane.
The formula is specially designed for foundational walls. Hence, it is strong enough to be used for any concrete crack. Aside from that, it prevents water from entering when fully cured. In fact, you can even use it to seal swimming pool cracks.
The Emecole Metro 102 Premium Polyurethane expands 20 times its original volume. Thus, you can sure it will fill all the interior cracks. Once it’s cured, it can expand and contract together with the concrete. This unique attribute is especially desirable if the concrete is subjected to freezing and thawing cycles.
The kit includes enough formula to repair approximately 30 feet of crack. Also, it’s easy to handle because of its low viscosity. The package also includes a caulk gun, which is very important for the application of the formula.
Perhaps the only downside with this kit is the price. It’s a bit on the expensive side. However, you will still be getting your money’s worth knowing it works very well, and it is easy to use.
Pros
- Very Thorough Kit – you probably don’t need anything else aside from what’s included in the kit.
- Emecole Metro 102 Premium Polyurethane – a very well-engineered formula.
- Experienced – the company has been around since 1987 and considered to be pioneers in the field.
Cons
- A bit expensive
2. RadonSeal Concrete Foundation Crack Repair Kit
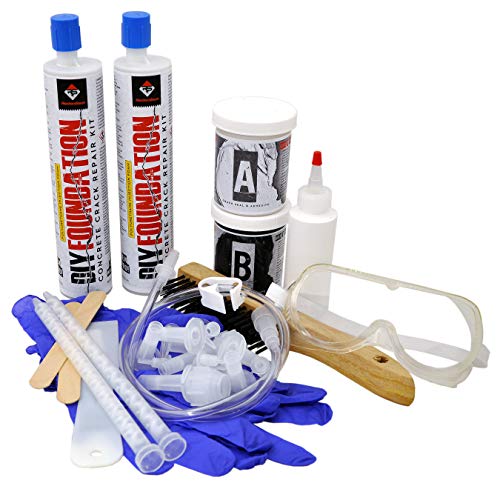
This crack repair kit has a trick under its sleeve. For now, it’s good to know that with this kit, there’s no need to do drillings to repair a concrete crack. You only need the kit’s polyurethane formula that comes into two components.
There’s enough product to cover about 10 feet of crack. It’s worth pointing out that the formula is low-viscosity. This means it’s easier to manage and inject. And most importantly, it can easily penetrate voids, making it suitable for repairing hairline cracks. The product also bonds tenaciously to concrete, whether it is dry or wet.
However, it’s still flexible enough to allow the natural movements of the concrete. One of the best things about this kit is that the formula can block radon, a radioactive gas that’s classified as carcinogenic. Since it can block radon, it also naturally blocks soil, water, and vapors.
The price is also very affordable, which makes it an excellent choice if the budget is a bit tight. Since this kit is affordable, then you can’t really expect that it will include a caulk gun. Perhaps the only downside is that the formula can only cover 10 feet of crack.
Pros
- Budget-friendly – it’s a very affordable crack repair kit
- Low- pressure formula – there’s no need to use specialized equipment to inject the product.
- Excellent barrier – blocks soil, water, vapor, and even radon
Cons
- Can only repair 10 feet of cracks
3. Applied Technologies Concrete Foundation Crack Leak Repair Kit
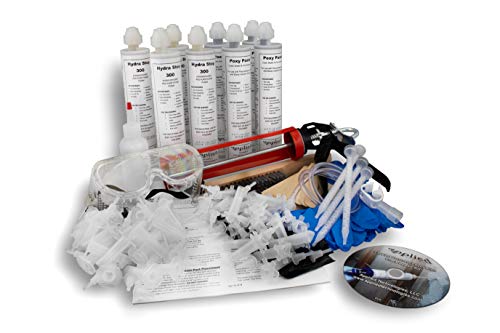
While there’s nothing unique about this crack repair kit, it’s priced so well that it is hard to ignore. First of all, this kit is good at repairing concrete cracks. However, the formula is good enough for cracks in the foundation wall too. As a bonus, it also blocks the water in case the crack comes with a leaking. The formula can repair about 20 feet of cracks.
While it doesn’t provide the most amount of coverage, it also doesn’t offer the least. The name of the formula used in the kit is Hydra Stop 300. It is a non-shrinking urethane foam. You don’t want a formula that shrinks as that would open up leaks that may compromise the integrity of the wall.
Despite that, the foam is still flexible, and does not hinder the natural movements of the concrete. Another thing that’s worth mentioning is that the package includes a very detailed step-by-step guide. If you’re handy enough, you probably don’t need to hire anyone if you follow the comprehensive guide.
Also, the kit includes a caulking gun. It’s a convenient package, so you don’t have to go shopping for a gun, and worrying if it will fit with the product’s bottles. When talking about downsides, there are not a lot of glaring issues with the package. The kit is priced just right when considering what it includes. Perhaps if there’s a downside, then it is just a “jack of all trades, master of none” type of kit.
Pros
- Good value – the price is just right, and it includes a caulking gun.
- Non-shrinking formula – doesn’t compromise the integrity of the wall.
- Easy-to-follow guide – it includes a detailed step-by-step guide.
Cons
- Jack of all trades master of none
4. Mar Flex Concrete Crack Repair Kit
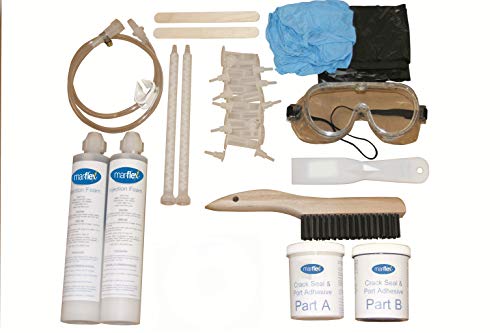
This one is another budget-friendly entry to the list. It’s a crack repair system that’s designed for poured wall construction. Considering how affordable it is, it’s got most of everything you need to repair a concrete wall crack. The kit includes two jars of Crack and Seal Port Adhesive. Furthermore, the package has 15 surface ports. Assuming that you will be spacing the surface ports at 10 inches apart, you should be able to cover around 12 feet of crack.
The injected formula is made of polyurethane. It’s pretty much the standard for crack injection repair systems as it’s quick to dry. Also, it does not impede the natural expansion and contraction of the concrete.
Another thing that’s worth mentioning with this kit is that it comes with an instructional CD. It’s a quick “how-to” guide to help you with the process if you want to go with the DIY route. The guide is in English and Spanish.
Coming at a very affordable price point, it’s hard to point out glaring issues with this kit. Perhaps you could say that the surface ports only covering 12 feet of crack may be an issue.
Pros
- Budget-friendly – one of the most affordable kits in this list.
- Polyurethane – standard for crack injection repair due to its quick-dry and concrete-bonding attribute.
- Instructional CD – available in English and Spanish.
Cons
- Surface ports only cover about 12 feet
5. Flexomeric Concrete Foundation Crack Repair Kit
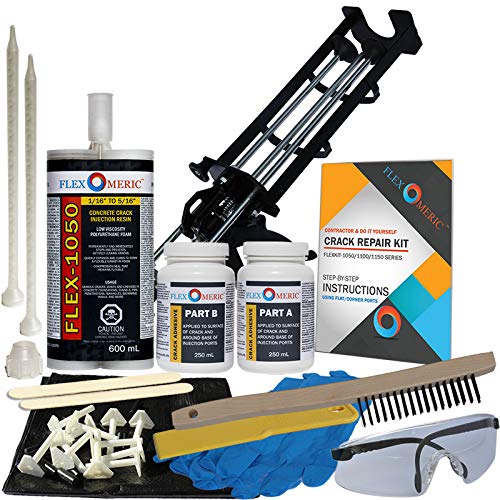
This kit is among the few that include a caulk gun. Well, it should be included because the formula that the package uses requires dual injections, which requires a tool that’s a bit specialized.
The kit is also designed to stop or prevent water leaks. However, it can be used for both dry and wet cracks. The formula is also excellent as it can expand 400% to 600% its original volume when fully cured. This is the reason why it does an excellent job at plugging water leaks.
Despite being air-tight, the formula remains flexible. It can adjust with the concrete shifting due to thermal cycles. Also, the kit is designed to repair cracks that are 1/16” to 5/16”. If there’s a downside to this kit, then it has to be the formula.
As mentioned above, you will need a dual cartridge gun. On the upside, there’s already a gun in the kit.
Pros
- Stops water leaks – the formula is specially designed to stop or prevent leaking water.
- Flexible – the formula remains flexible to accommodate concrete shifting.
- Includes a caulk gun – no need to make a separate purchase.
Cons
- The formula needs a dual injection gun.
Types of Basement Wall Cracks
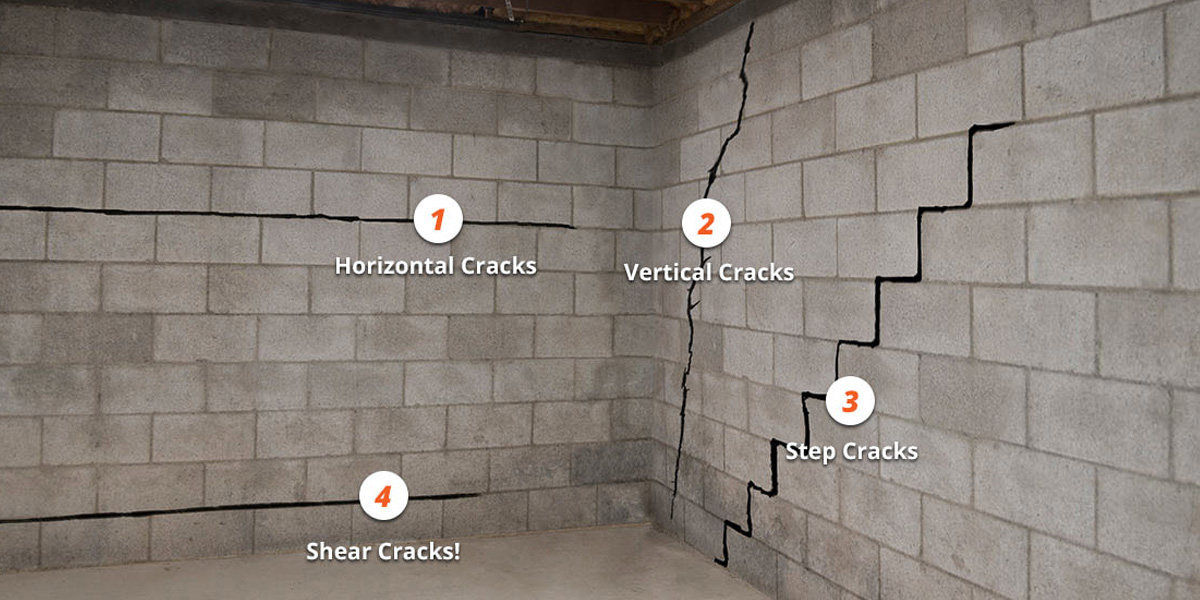
Knowing the kind of cracks you have in your basement walls will help you determine the severity of damage that your home has sustained. However, you should keep in mind that any cracking you discover, especially in the foundation of your home, must be taken seriously. Inspect cracks closely and repair them to protect your home and ensure structural integrity.
- Structural Cracks
Structural cracks are the most serious, so if you see them, you have to act as soon as possible as the cracks pose risks to your home’s structural integrity.
A sure sign of a deficiency is a crack that is ¼-inch wide or more. A structural crack in a basement wall is typically due to movement, whether it is from soil shrinkage, soil pressure or temperature changes.
If you spot moisture or water coming from structural cracks, the quicker you repair them, the better. Quickly changing patterns of local climates can cause cracks to worsen or lead to even more water and moisture issues.
- Non-Structural Cracks
A non-structural crack in basement walls doesn’t pose any threat to a home’s structure, and it usually results in leaking only when the snow melts or during rainstorms. Although there is no structural threat with this kind of basement wall crack, water that’s seeping into the basement is a matter that requires attention and has to be taken seriously.
Water leaking into a basement can ruin belongings, floors, walls, and contribute to the development of mold and mildew. When left unattended, non-structural basement wall cracks may get worse as well. This is why homeowners are advised to act fast in addressing cracks, no matter how small or insignificant they may seem. Don’t wait until water has seeped into your interior before you fix the issue.
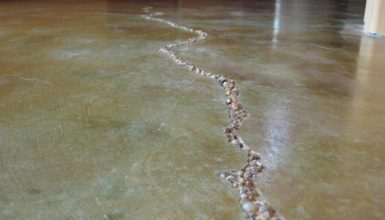
Take note: Basement walls made of concrete often have minute cosmetic cracks which are normal from concrete’s natural curing process. With cracks that are between one to two millimeters each and run diagonally or vertically, they may be non-structural.
- Horizontal Cracks
Horizontal cracks are the ones you need to watch out for because they signal serious damage to the structural integrity and foundation of a home.
While they’re seen in homes that have poured concrete foundations, they’re more commonly found in homes with brick or block foundations. Several things cause this kind of foundation damage, such as hydrostatic pressure that makes a basement wall to bow and soil pressure outside the foundation.
If you notice horizontal cracks, it’s important to repair the basement walls as quickly as possible before your home’s structural integrity is compromised. This kind of cracking can require extensive repair to secure the foundation and prevent it from causing any further damage.
- Vertical Cracks
Vertical cracks, in general, are the least severe and most common cracks you’re likely to encounter. They go all the way up or down or slightly diagonally, within 30-75 degrees vertical. They’re common occurrences in houses and usually result from foundation settling.
It is, therefore, not uncommon for a new house to have vertical cracks as the foundation of a home can settle greatly within the first year. Fortunately, vertical cracks are the least expensive and the easiest to seal. However, you should repair them immediately as they can grow or open even more.
- Diagonal Cracks
Cracks that are diagonal run along basement walls at a 30 to 75-degree angle. A thin, hairline diagonal crack is usually wide at one end compared to the other. A diagonal basement wall crack is often caused by “differential settlement.” In this case, one side of the foundation of a home settles lower than the other parts.
This uneven tension causes the diagonal cracking and happens because they house has been built on uneven ground or slope. It may also because of the contraction or expansion of soil under a certain portion of a house.
This kind of cracking can be sealed but the reason for the differential settlement has to be addressed. The solution can be the installation of new gutters which redirects rainwater away from your property, especially from an area that gets flooded regularly and causes the soil under one portion of your home to shift.
Basement Wall Crack Repair Methods


