
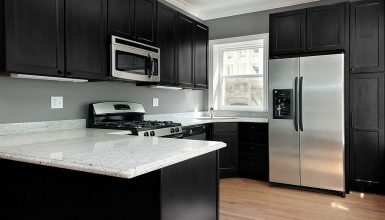
Redoing your countertops can be expensive, especially if you want to replace laminate or tile countertops with granite. But what if you could have the look of granite countertops at a tiny fraction of the price?
Painting kitchen countertops to look like granite is the promise of Giani Granite. Instead of spending over a thousand dollars to get new granite countertops, you can use this DIY kit to transform your kitchen in just a few days.
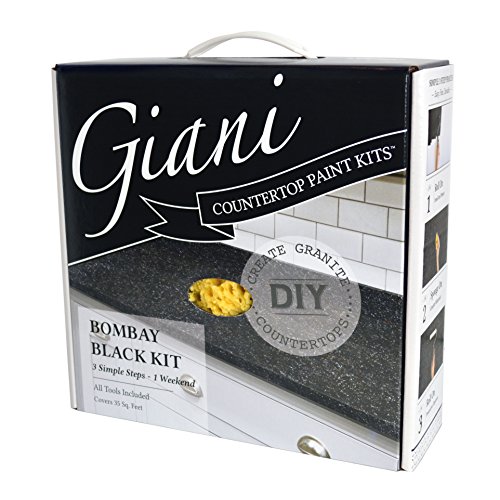
What is the Giani Countertop Paint Kit?
The idea of painting your countertops may not have occurred to you. For that reason, you might be wondering what comes with this kit and how complicated it is to use.
Each kit covers up to 35 square feet. That translates to 16 running feet of a standard 24-inch wide counter.
There are several layers to be applied to get the look you want. Here’s what comes with the kit:
- A 16-ounce can of primer to prepare your countertops for painting
- 6 ounces of mineral colors paint in various colors to get the look of granite
- 16 ounces of topcoat to finish your countertop
- A Giani sponge for applying the mineral colors
- A foam brush
- A roller handle
- 2 roller covers
- A practice board
The faux granite countertop paint also comes with step-by-step instructions for the application of each layer. In theory, you get everything you need to finish your countertops. However, as you’ll see, there are a couple of things that can make the finished results look like real granite that isn’t included in the kit.
How to Paint Countertops to Look Like Granite with Giani Paint?
We tested the Giani Granite Countertop Paint Kit out and here’s what we found.
First, you need to have several free days to do this project. Each layer needs time to dry before you move on to the next layer. If you live in a humid or wet climate, then products may take longer to dry but using fans can speed up the process.
The next thing we found is that practice makes perfect. Giani thoughtfully includes a practice board with the kit, but we think you’ll get even better results if you buy a black poster board and experiment with the mineral colors before applying them to your countertops.
Your countertops should be clean and smooth before you start the application. If you have chips in your current countertops, fill them in with a with a waterproof filler. Let the filler dry and then lightly sand your countertops with sandpaper to ensure that everything adheres to it.
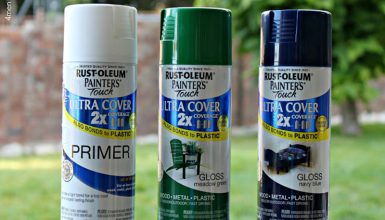
If your counter has a raised edge or lip, then you may want to consider leveling it off before you start – especially if you decide to replace the included top coat with an epoxy finish.
Applying the primer is easy. You simply brush it on with the enclosed brush and wait for it to dry.
The mineral paints are quite thin and dipping the included sponge in them may result in a blotchy-looking countertop. We tried a couple of different techniques and finally found that dabbing the mineral colors onto the sponge with a brush worked best.
The keys to applying the mineral colors are:
- Use a light hand – you can always add more paint, but it’s hard to fix if you put on too much
- Apply each color in a random pattern to mimic the look of real granite
- Allow each color to dry before moving on to the next
It might help to look at some pictures of real granite before you work to get an idea of how the colors occur in nature. Keep in mind that the white paint is just a highlight. Use it sparingly for the best results.
Once all the mineral colors were applied, we tried the top coat. The kit says to apply it in two coats. We found that the coat was a bit thin. We were curious, so we tested it out using an epoxy instead, and it made a big difference.
If you decide to use epoxy, keep in mind that it’s self-leveling so you’ll need to make sure that your countertops are level before you begin if you don’t want to end up with an uneven coat of epoxy over the paint.
We also want you to know that you can’t use epoxy on the backsplash of your counter since it will run. Use the included top coat if you’re doing your backsplash.
Overall, we think this kit delivers on its promises. Provided you take your time, practice first, and allow each layer to dry, you can have countertops that look like real granite for a small fraction of the price.
Pros and Cons
We like this kit, but we think it’s important to be thorough. There are some potential downsides to using it, and we want to acknowledge those.
Let’s start by looking at what we think are the biggest pros of this kit:
- It’s an affordable way to get the look of real granite countertops in your kitchen
- If applied properly, the mineral colors make for an attractive appearance
- This is an easy, DIY kit that anybody can use
Now, let’s talk about some of the potential downsides:
- If you don’t give the layers time to dry between coats, you may end up with chips in your countertop
- We think the top coat could be more durable, so we recommend replacing it with an epoxy to give your countertops a long life
- Using this kit requires real patience and practice – the mineral colors are thin and may run if you dip the sponge in them as Giani’s instructions say
This product is a perfect kit that can deliver beautiful results if you follow the modifications we’ve described and practice the paint application before you begin the project.
Top Rated Giani Countertop Paint Kit Colors


Final Verdict
We think the Giani Granite Countertop Paint Kit is an excellent value for people who want a new look for their kitchen but don’t want to spend big money on real granite.


