
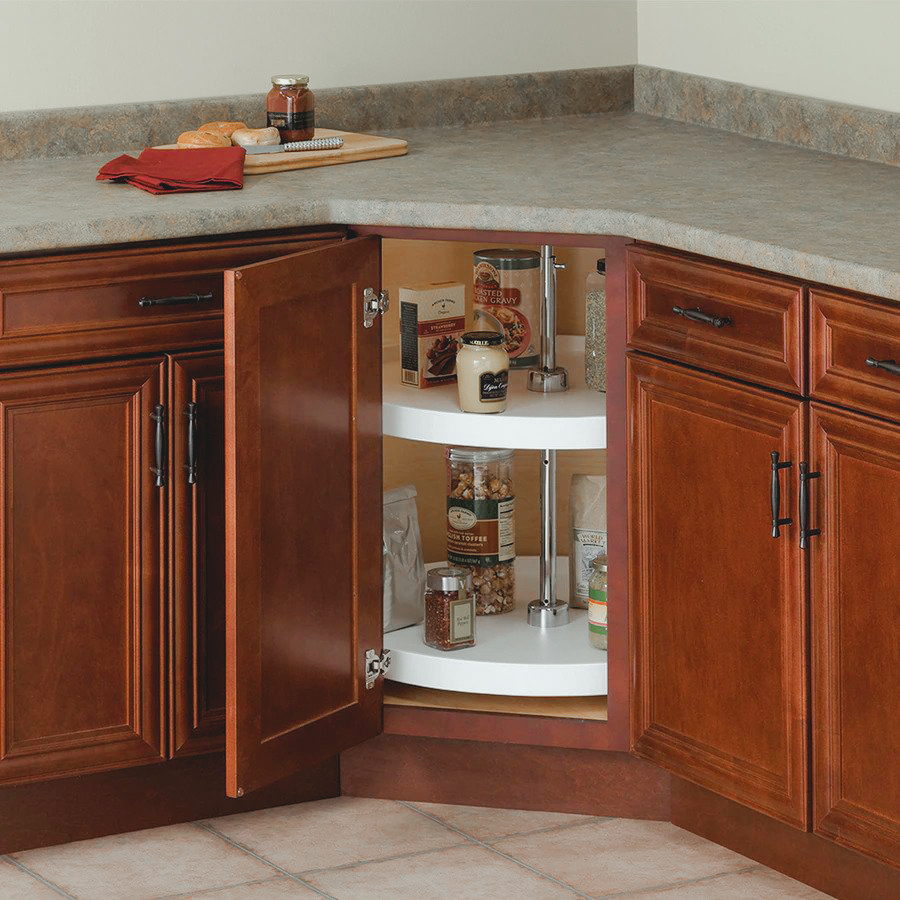
Are you tired of the never-ending game of “where did I put that?” that comes with a lazy susan? You’re not alone. A survey found that 75% of people find lazy susans to be frustrating and inefficient.
It’s time to say goodbye to the lazy susan and hello to some stylish and functional shelves. Not only will shelves give you easier access to all of your items, but they also provide extra storage space. In this post, we’ll walk you through the simple process of replacing a lazy susan with shelves in your cabinet.
Tools You Will Need
Before you start your project, it’s important to gather all of the necessary tools and materials. You’ll need:
- A drill: Any standard drill should do the trick
- Screws: You’ll need screws that are long enough to securely hold the shelves in place, but not so long that they come out the other side of the cabinet. A good rule of thumb is to use screws that are about 1/2 to 3/4 the thickness of the shelves.
- Shelving units: Choose shelves that fit the width and depth of your cabinet. Measure the inside of your cabinet to ensure a proper fit.
- Level: A small bubble level will help you make sure your shelves are straight.
- Measuring tape: A tape measure will come in handy for taking precise measurements of the cabinet and shelves.
Preparation
Before you start installing your new shelves, there are a few important preparation steps to follow.
First, measure the inside of your cabinet to determine the size and number of shelves you’ll need. Make sure to leave enough space between the shelves for tall items.
Next, if you’re replacing a lazy susan, you’ll need to remove it from the cabinet. Most lazy susans are attached with screws or brackets, so use a drill or screwdriver to remove them. Carefully lift the lazy susan out of the cabinet. If it’s heavy or difficult to maneuver, you may need a helper.
Once the lazy susan is removed, use a cloth to clean any debris or dust from the inside of the cabinet. It will help ensure a smooth and stable installation for your new shelves.
Finally, use a pencil to mark the locations of your shelves on the inside of the cabinet. Make sure to double-check your measurements and use a level to ensure the marks are straight. With these steps completed, you’re ready to start installing your new shelves.
Installing the shelves
Installing the shelves is a relatively simple process. Here’s how to do it:
- Begin by attaching the mounting brackets to the shelves. Follow the manufacturer’s instructions for the specific brackets and shelves you’re using.
- Hold the shelf up to the marked locations in the cabinet and use a level to ensure it’s straight.
- Use a drill to attach the shelf to the cabinet using the screws and mounting brackets. Make sure to use enough screws to securely hold the shelf in place.
- Repeat this process for each shelf, making sure to double-check that each one is level before attaching it to the cabinet.
- Once all of the shelves are installed, take a step back and make sure everything looks straight and level.
With these steps, your new shelves should be securely in place and ready to use.
Finishing Touches
Now that your new shelves are installed, it’s time to add the finishing touches. Here are a few things you might want to consider:
- Shelf liners: Shelf liners can add a layer of protection for your shelves and help prevent items from sliding around. They also add a bit of extra cushioning for delicate items.
- Organize items: Take some time to reorganize the items on your new shelves. Group similar items and try to utilize all of the available space.
- Add labels: Consider labeling the shelves to help keep things organized and make it easier to find items. It can be especially helpful if you have a lot of similar items or if you share the space with others.
- Add decorative touches: If you want to add a personal touch, consider adding some decorative elements to the shelves. This could be anything from vases and plants to frames and trinkets.
Conclusion
Replacing a lazy susan with shelves is a simple DIY project that can have a big impact on the functionality and organization of your kitchen or pantry. By following the steps outlined in this article, you can easily transform a cluttered and frustrating space into one that is efficient and enjoyable to use.
We hope this guide has inspired you to try the project yourself and say goodbye to the lazy susan once and for all.


