
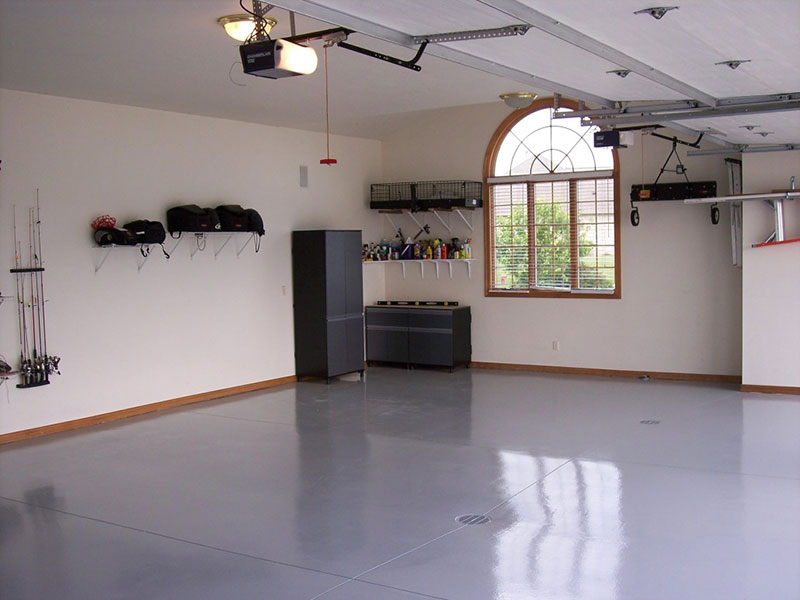
In modern days, epoxy is steadily growing in popularity as a coating solution. Epoxy flooring essentially allows someone to have a gorgeous, easy to clean, and durable floor by comparison to the more traditional bare concrete floors typically seen in garages all across the nation.
While there are a plethora of benefits when it comes to choosing epoxy over other floor coating solutions – the most notable would be the affordability and how great it looks. You can purchase epoxy online by the gallon, and it cost you anywhere between $30 and $150 depending on the quality of the solution, and the percentage of epoxy the solution contains.
Picking out the best epoxy kit among the huge number of different brands available online can be a pretty tough task, especially for someone with little to no experience. This is why we’ve decided to put together a quick short-list of the top 5 garage floor coating kits to help you simplify the selection process and get the possible best kit for your project.
Let’s get started.
The 5 Best Garage Floor Epoxy Coating Kits
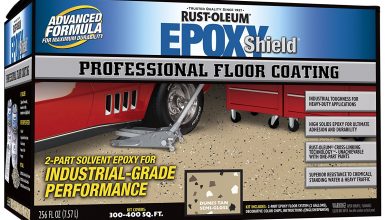
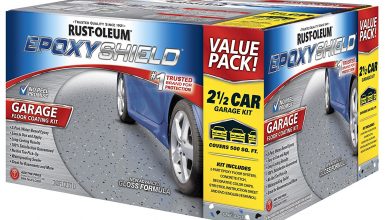
1. Rust-Oleum EpoxyShield Garage Floor Coating Kit
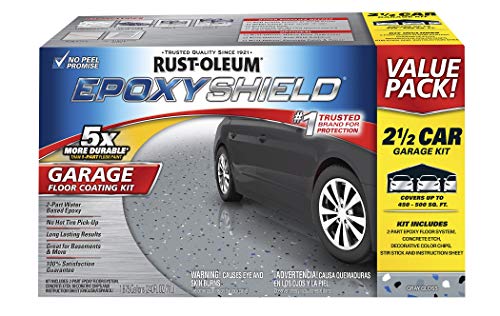
Rust-Oleum has a great reputation in the market for being one of the best paint and coating manufacturers. Since the EpoxyShield kit was introduced in early 2012, it’s been proven to be one of the most durable epoxy solutions among the many competing kits available to the average consumer.
Whether you want to use Rust-Oleum EpoxyShield to coat your garage, or even cover an industrial space such as a storage room, it retains it’s luster and can easily withstand wear and tear for years on end. In fact, Rust-Oleum boasts that the coating is completely resistant to normally tough-to-handle spills like gasoline, car oil, brine, and even anti-freeze. Overtop of this, it only takes around 24 hours to settle, and it can be ready for normal use in as little as 72 hours after being applied.
The kit is officially marketed as having a 500-foot coverage, which means it should easily cover a two-car garage floor or even a small basement in most cases. However, keep in mind that if you’re planning to buy multiple kits to cover a larger area, you may end up getting a small bit of color variation between each tin.
Another potential problem that some consumers have reported throughout the years is a notable difference in consistency between kits. However, this is something that’s plagued the epoxy coating industry for decades and doesn’t exclusively apply to Rust-Oleum’s kits.
With a very wide range of potential applications and the overall resilience that the kit offers – it’s no surprise that it’s arguably one of the most popular solutions available today. All in all, there are very few downsides to choosing the Rust-Oleum EpoxyShield kit. And it’s definitely a solution that deserves to be right up at the top of your short-list.
2. Rust-Oleum Professional Garage Floor Coating Kit
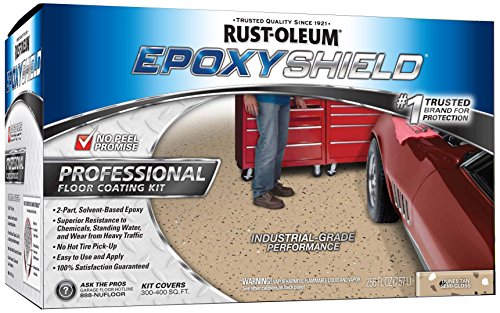
While the company’s EpoxyShield coating kit is practically an industry standard – they do manufacture several other professional kits for the general consumer market. However, with a bulk of the marketing efforts being focused on EpoxyShield, it’s not surprising that most people trying to pick out a coating solution aren’t even aware of the existence of their other products.
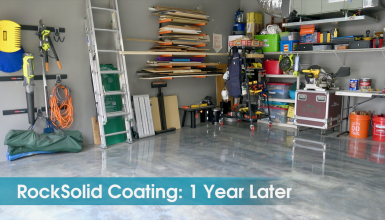
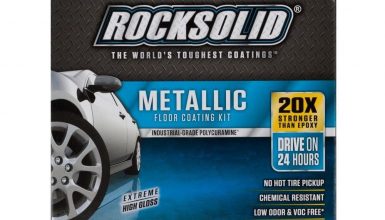
These other kits offer some nice alternatives to people who are open to stepping outside of the realm of epoxy coatings. For example, the Rust-Oleum RockSolid metallic coating kit features an industrial-grade polycuramine compound that offers unparalleled protection and seamless durability. While it may not be as eye-catching and stylish as an epoxy solution – it’s a great option for garages, storage units, and even workshops.
In fact, the polycuramine formula has been lab-tested and proven to be up to twenty times stronger than most epoxy resins. This means that you don’t have to worry about any kind of impact damage, chemical exposure, spills or wear due to heavy traffic. Adding on to the list of benefits, it should be noted that this coating can be ready for use in just 24 hours after being applied, whereas most epoxy solutions take around 72 hours to fully cure. And if you make a mistake – don’t worry, it can easily be removed with mineral spirits.
Unfortunately, it does have some downsides when compared to popular epoxy kits. For example, one case of the Rust-Oleum RockSolid coating would only cover an area of around 125 feet. This is pretty meager when compared to the 500-foot coverage of their EpoxyShield kit and effectively cuts into the cost-efficiency of this option. However, if you don’t mind the cost and want an easy to use solution that’s far more durable than epoxy – it’s definitely a great option to consider.
3. Coloredepoxies Garage Floor Coating Kit
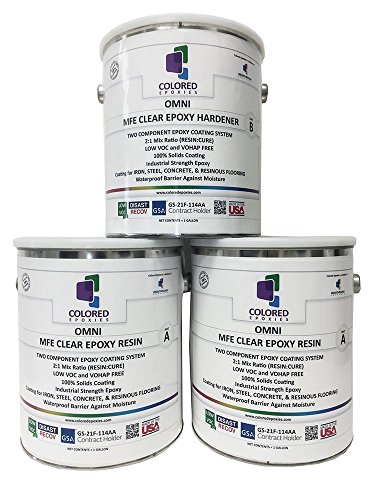
Even though this kit is not as well known as some of the other professional coating solutions in this list – it definitely doesn’t fall short when it comes to its durability, ease of application, and longevity. The Coloredepoxies garage floor coating kit comes with just about everything you’ll need to apply it and get it ready for use. Besides the resin itself, the kit includes a standard cleaning solution, a roller, some rags, and even protective gloves to help you get the job done.
The epoxy coating used in this kit is a 2-part resin made with 100% solids. This means that, if cured properly, it won’t crack or dust after it’s been applied. Once cured, Coloredepoxies mentions that the coating stays shiny and new for many years, in just about any environment. They even market it to be chemical spill-resistant and to be durable against UV rays – making it an amazingly affordable kit to use for commercial projects.
The list of pros continues with a promised coverage of 700 feet per tin, making it a solid kit and a definite rival to some of the more popular solutions from Rust-Oleum and Supercoat. Another notable upside to this kit is the fact that it comes with a wide array of available color options, giving you a lot more freedom of choice for your projects. With so many upsides, it’s easy to see why Coloredepoxies has enjoyed a steadily-growing presence on the market over the last few years.
However, potential buyers should know that this is one of the toughest kits to clean up, should you make a mistake while applying it. And while it may be one of the most cost-effective options on the market, if you’re planning on going with a light color – you will need to apply two coats.
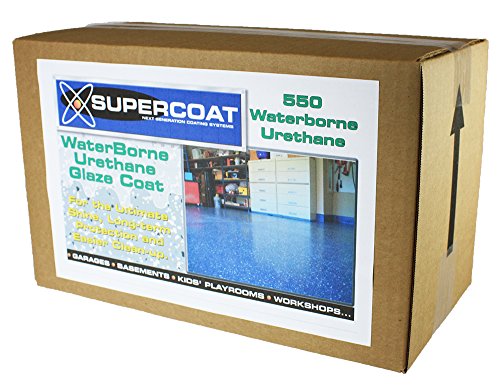
4. Supercoat Garage Floor Epoxy Coating Kit
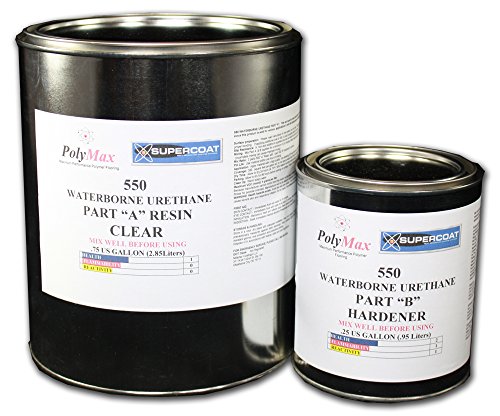
Just like Rust-Oleum, Supercoat is one of the better-known floor coating and paint manufacturers on the market. They’ve enjoyed a very long and solid reputation among consumers, and their DecoEffects epoxy kit is one of the industry go-to solutions for residential projects.
Some of the best-known upsides to choosing the Supercoat garage floor epoxy coating kit include the fact that it’s compatible with both wood and concrete floors while also being one of the quickest to cure. The kit comes with a polyurethane hardener and some decorative chips to help you get a more stylish look going on, without breaking the bank.
However, buyers should keep in mind that even though it’s supposed to have a 500-foot coverage just like Rust-Oleum’s EpoxyShield kit, it’s actually been reported to be closer to the 400-foot range instead. So be sure to buy a little extra if you’re considering using this kit to coat your two-car garage.
Another potential drawback is the fact that you can’t apply the Supercoat garage floor epoxy coating kit in temperatures under 60° Fahrenheit. While for most of us, it might not be a huge deterrent – it can be a potential deal-breaker for people living in fairly temperate and cold areas.
Just like the other kits on this list, it’s very resistant to just about every type of spill and won’t be affected by peeling or blistering from moisture or hot weather. So if you don’t mind the cons listed above, this professional epoxy kit is a fantastic choice to transform and protect your garage floor.
5. Rokrez Garage Epoxy Floor Coating Kit

If you’re looking to convert a drab and dull concrete surface while protecting the aging concrete – the Rokrez epoxy kit may just be the right solution for you. This kit is designed for heavy-duty use and offers a very easy application process along with self-leveling, making it a great choice for someone that isn’t very familiar with applying epoxy solutions.
Other notable benefits include the fact that it’s resistant to all sorts of chemicals and abrasions. It’s even proven to be impact resistant, according to Rokrez and many customer testimonials. This means that it can be used in both residential and commercial applications. Whether you’re aiming for a garage makeover or trying to find the best epoxy kit for your warehouse, it’s not an overstatement to say that the Rokrez epoxy kit is capable of tackling practically any project.
In terms of coverage, this kit doesn’t stand out much, being rated at 450-500 feet per tin. Interestingly enough, due to the fact that it’s made with 100% solids, it dries to be almost two times thicker than most water-based epoxy coatings, eliminating the need for double-coats even for large-scale projects. This fact, along with how easy it is to apply, makes it a very cost-effective option for most people.
However, buyers are fairly limited when it comes to color choices, as the kit is only offered in either gray or tan. But to make up for the lack of creative freedom, Rokrez does throw in some decorative chip flakes together with one of the best high-gloss finishes out there. So if you don’t mind either of the two colors, the Rokrez garage floor epoxy kit is definitely a solid choice to go with.
Ultimate Guide
When it comes to home flooring, there is nowhere that needs to a more robust floor than the garage. Over time it will be subjected to many bangs, dents, knocks, and chemical spills that would destroy most flooring types.
There are however a handful of types of flooring that can withstand the rigors of a garage. The for many many years. Garage Floor Epoxy is one of those materials, and it is rising in popularity year on year.
Today we are going to tell you absolutely everything you could ever want to know about Epoxy flooring.
What Is Epoxy Coating ?
First things first. Epoxy is not the name of the actual material that is being used here. The word Epoxy actually refers to the chemical composition of the material (specifically the way it hardens).
Epoxy is a two-part system, on their own, neither of the parts will harden to become a solid. But when combined together, the chemicals interact with one another and become a single solid material.
This is what people call Epoxy, but the actual chemicals used under that “umbrella” term can vary. Regardless of the chemicals used, Epoxy has some very impressive qualities that make it ideal to be used as flooring.
It is incredibly strong and durable, it will bond with most materials that could be used as a base layer, is completely nonporous, and it is very easily repaired. In fact, it is so strong, it is one of the most common materials used for flooring in heavy traffic or high footfall areas (For example factories, hospitals, and schools).
I’m sure you will agree, it sounds perfect for garage flooring.
What is an epoxy coating? Epoxy floor coating is the exact same material as Epoxy flooring, the only difference is the thickness. Epoxy flooring is generally accepted to be any floor that has more than 2mm (in total) of Epoxy layers. Epoxy floor coating is considered to be anything that has less than 2 mm of Epoxy layers.
Epoxy coating has all of the benefits of Epoxy flooring and is much easier to install.
Full Epoxy flooring is only really beneficial in situations where the base material is not in great shape. The main example is a concrete floor with pitting and cracks that need to be filled in.
This makes Epoxy coating just as good as Epoxy flooring for the garage, which one you use depends on the quality of your current floor.
Types Of Epoxy Coating Systems
There is a wide range of different Epoxy flooring systems, each with their own set of strengths and weaknesses.
Here we will list some of the most popular, and common types of Epoxy that could be suitable for use in the garage. (All of these types of Epoxy can be No other material can as an Epoxy coating too).
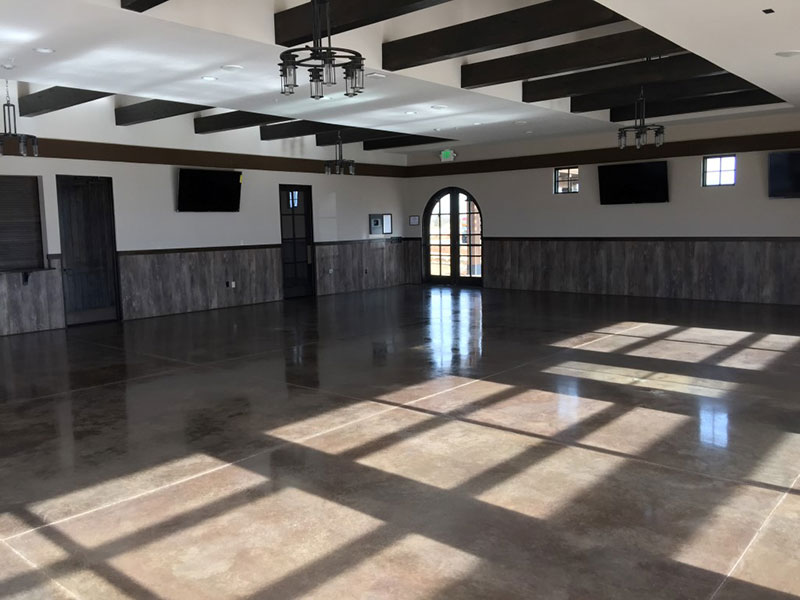
- Self Levelling
As you can imagine from the name, Self Levelling Epoxy flooring levels itself. It’s one of the toughest kinds of Epoxy and can be found in warehouses and factories all over the world.
Because of its super durable nature, it is perfect for areas that expect to have a large amount of constant traffic (for example forklift trucks or trollies). It is so hard, it is almost overkill for a garage floor – but in reality, it’s the most popular choice.
It is most commonly used directly upon old concrete floors that can have cracks or bumps in them. The thinner nature of the Epoxy when it is its liquid form means it can easily get into every little crack and hole to create a singular solid surface. So providing you use enough of it to cover all the bumps in your floor. You can get a perfectly flat, perfectly smooth floor with the minimum of effort.
Self Leveling Epoxy can be colored any way you like. Epoxy is generally clear, so it is easy for manufacturers to create all kinds of colors ranging from subtle dark tones, through to electric neon pink.
The one issue with self-leveling Epoxy (and a few other types of Epoxy) is that it can be a little bit slippery, especially when wet. Self Leveling Epoxy can be mixed with quartz sand which will harden with the material when it sets. This makes the surface much less slippery and is a great option for garage flooring due to the inevitable oil and water spills that will happen during the day to day life.
- Mortar
This is the toughest, strongest, hardest working Epoxy on the market right now. You may have come across it in some form or another already – it is commonly used in skateboard parks and heavy industrial areas.
It is much more tricky to install than self-levelling Epoxy and can also cost quite a bit more too. So while this is the strongest Epoxy you can buy, we don’t recommend it. It is far too expensive and too difficult to install to be justified for use as garage flooring.
- Gravel / Stone
Stone Epoxy Flooring is an excellent option for people who want to make their garage a little special inside instead of just being a space to store their car and tools. This kind of Epoxy is made by mixing small stones or pieces of gravel with a solid Epoxy mixture and then manually spreading it out on the floor. Once laid down it is then sealed with a final top coat for protection.
Like all Epoxy flooring, it is very tough, but it is a little bit less durable than self-leveling Epoxy. Gravel Epoxy is much more expensive than self-leveling and will take significantly longer to install. But if you are looking for something that is beautiful and durable – this could be the Epoxy for you.
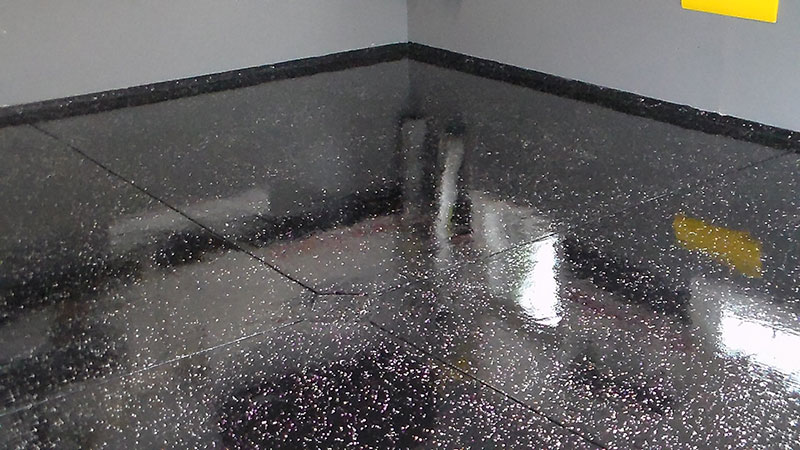
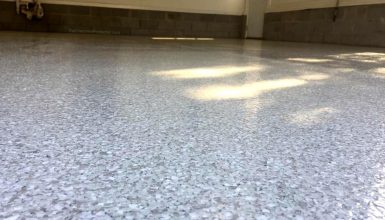
- Decorative / Flake
This is not a different kind of Epoxy, but we thought it deserved its section. Decorative Epoxy flooring can be made by mixing various substances in with self-leveling Epoxy to make a solid, dazzling, and impressive floor that does not cost much more to make.
There is a wide range of substances that can be used to make Epoxy decorative, but two of the most popular are flake and glitter.
Flake is a series of usually pearlescent metallic flakes that are scattered around the floor before the final top coat layer. This adds a sparkle to your floor wherever you stand in the room and is quite a strong effect (that might not be to everyone’s tastes).
But if you are the kind of person that like to make a bold statement with their flooring, perhaps you should go one further and get glitter Epoxy.
Like the flake above, glitter is spread by hand over the penultimate layer of Epoxy and then sealed with the final top layer. The effect is something that has to be seen to be believed, and your entire floor will look like glitter. Again, this might not be to everyone’s tastes – but it doesn’t cost much more to do, and is a very dramatic effect, to say the least.
We like the idea of these slightly outlandish and daring Epoxy flooring designs. If there is ever a place in the home that you can go a little bit wild with the décor – it’s the garage.
Pros And Cons
Pros
- Durable
You will not find many materials for garage flooring that are more durable than Epoxy. It will be able to withstand the stresses of garage life with ease, so you don’t worry about dropping tools on it, spilling chemicals on it, or anything else for that matter.
- Cheap
Epoxy is incredibly cheap to install, especially compared to other materials of the same quality. Things get a little expensive when you start to use fancy epoxies (like gravel Epoxy) but again – compared to other fancy alternatives, it’s cheap.
- Customizable
The clear nature of Epoxy means that it is easy to customize the color to whatever you want. Some of the best manufacturers will even totally customize the Epoxy color to match other items. So if you have a motorbike or a classic car that is your pride and joy, why not get an exact color match Epoxy resin floor to match it.
- Easy To Clean
Because Epoxy is nonporous cleaning is super easy, and super quick. A simple mop will glide over the floor with next to no effort at all, and a single car garage can be cleaned in under 5 minutes.
- Long Lasting
There is a running joke among builders who install Epoxy resin floors. They often say “this floor will outlast the house.” Many times, this silly little joke is true. You will get decades of use out of an Epoxy garage floor before it needs to be replaced. It really is a case of set and forgets.
Cons
- Slippery
The biggest issue for many people with Epoxy is the fact that it can be very slippery when wet. This can be quite a serious hazard because of a slip onto something as solid and unforgiving as Epoxy flooring can be a recipe for a trip to the hospital.
This issue can be mitigated by adding quartz sand into the Epoxy when it is being installed, and as such, it is something we highly recommend.
- Can Be Tricky To Install
While installing Epoxy is something that requires less technical knowledge than installing something like concrete – it can be reasonably fiddly and tricky to install.
With patience, it’s a task that most people would be able to undertake successfully. But keeping the required amount of patience for the entirety of the project can be a little tricky. Gravel Epoxy is especially difficult to install, be prepared for several days of work.
How Much Does Garage Floor Epoxy Cost?
Get ready to be excited. Epoxy is one of the cheapest ways to coat your garage floor in the world.
You are going to roughly be paying around $30 to $40 per square meter of flooring for the actual Epoxy itself (if you are using self-leveling Epoxy). But there are a few additional costs that should also be taken into account. Things like:
- Acid etch or floor grinder hire
- Drill Mixer
- Glitter or metallic flake
- Coloring
- Buckets, rollers, mixing sticks, etc
The only other additional cost that you will come across is if you are using gravel or stone Epoxy.
You do not need to buy any “special” Epoxy stone, and any nonporous stone should do (check with the store before you buy). This can be a significant additional cost, but there are also some reasonably cheap options that could be considered if you wish to keep things within a reasonably small budget.
How To Apply Garage Floor Coating
Epoxy flooring is reasonably easy to install, depending on the kind of Epoxy you are using. Here we are going to mainly talk about the steps involved for self-leveling Epoxy as it is the most common.
Technically you do not need two people to carry out the steps below. But due to the time-sensitive nature of the project (you need to get the floor done before the Epoxy hardens), it is better to have a friend or family member help you for the day.
- Step 1 – Preparation
You may have heard the saying “proper preparation prevents poor performance,” and this has never been truer than when working with Epoxy. We know it is tempting to skip the preparation and dive straight into the good stuff – but resist that urge. If you do this step properly, you will thank yourself in years to come when your floor is still going strong.
First thing is; first, you need to inspect the garage floor to see if it needs to be sanded back before applying the Epoxy. Epoxy will not adhere properly to a concrete floor that has been sealed or coated. If your garage is sealed or coated, you will need to hire a floor sander and sand it all off before applying the Epoxy.
You should also check for moisture on the flooring. Epoxy can handle a little bit of moisture and still cure properly – but too much and you will start to encounter problems. Check for white patches of Efflorescence on the concrete or constant areas of dampness.
(Even if you have no signs of damp you should conduct a concrete dampness test just to be on the safe side – it’s much easier to fix before you apply Epoxy to the floor).
If your moisture check comes back ok, then it’s time to get cleaning. Check for any oil stains on the concrete because they will repel the Epoxy (regardless of how old they are). They are not difficult to clean up and need to be removed before you continue any further.
Once your garage floor is free from moisture, and oil its time to sweep up. Do an excellent job here; your garage floor should be the cleanest it has ever been. Every single little bit of dirt and dust should be removed (if it gets into the Epoxy it can be visible, and it becomes permanently irritating).
- Step 2 – Profiling
Profiling is probably the most important step in the whole of the application process. It essentially opens up the concrete on a microscopic level making it slightly porous. This allows the Epoxy to bond with the concrete securely and fully. Failure to do this step properly can ruin your floor (and we should mention here that removing an Epoxy floor is an incredibly difficult task). Take the time to do this properly.
Ideally, you will grind the floor with a floor grinder, and this is the best method to properly open up the concrete allowing it to accept the Epoxy as much as possible. Make sure you clean up properly after doing this, dust will get everywhere. You are going to have to clean like you have never cleaned before! A good test is to run your finger over the surface of the concrete after you think you have finished cleaning. If you get a build up of white powder on your finger, then you need to get the broom out again – because you have not cleaned enough.
However, if you don’t have a floor grinder, you could also use an acid etch for this step. An acid etch is much simpler and involves “mopping” a liquid acidic substance over the concrete which eats into it. This has a similar, but less effective effect as grinding (but it’s usually more than enough in most cases). If you use acid etching be sure to give your floor adequate time to dry, as it will continue to release moisture even after it looks dry to the eye (48 hours will be enough time).
Once you have done this step you should treat your garage as a clean room, nothing and no one should go in it until the floor is completed. The smallest bit of dirt or oil or grease at this stage can ruin the flooring.
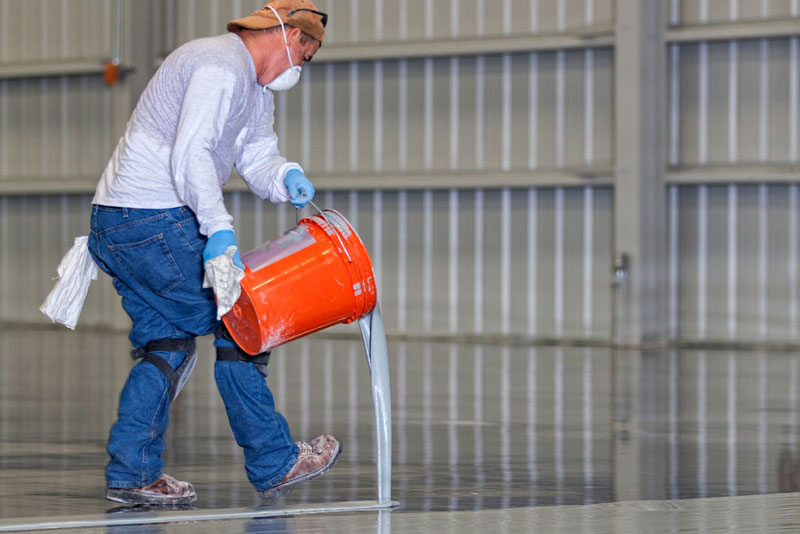
- Step 3 – Apply Epoxy
This is the crunch moment before you get to this point you need to double check absolutely everything. Make sure you have a dedicated mixing station (outside the garage), ensure you have all the equipment you need, ensure you have enough Epoxy, and ensure you have planned what you are going to do down to the last little detail.
This is going to be a time sensitive operation. Don’t worry too much, because you will have enough time for it with some to spare if you are comfortable with all the steps. But you won’t have enough time to watch youtube videos on how to do it once you have started.
Each manufacturer will have their own process you need to follow, so this section should be considered a rough guide only. In every instance, the manufacturer’s instructions should supersede anything we say here.
Firstly you need to ensure both parts of your Epoxy do not have any sediment in them so mix the bottles individually first. Be sure to use a separate mixing stick for each bottle, because if you don’t, you will start the chemical hardening reaction accidentally.
If you need more than one container of Epoxy for your floor, it is best to mix them all together at the same time in one big batch. If you don’t do this color uniformity can be an issue, and you will have lighter patches and darker patches on your floor.
Mix both parts together using a mixing drill until the color is uniform (follow the manufacturer’s recommendation here). If this is your top coat, then this is where you would also add the quartz sand (if you have decided to use it). Do not introduce air bubbles into the Epoxy mixture (bubbles will say in the Epoxy after it has set and will weaken the floor), so mix gently.
Once mixed the application process is reasonably easy. Simply apply a small amount in a long thin section and then roller it flat around the area. If you notice any areas that need touching up while you are doing this, then fix them immediately (doing it after you have done other sections can make it look worse).
Multiple thinner layers are usually advised as opposed to a few thicker layers. Although if you are doing the colored layer, then it is best to be liberal with the thickness.
Once you have done the coat leave it to cure as per the manufacturer’s recommendations (usually overnight) and then repeat the process for the next layer.
If you are applying glitter or flake, you should do this immediately after you have finished applying your penultimate layer. Scatter it around as you wish (there are good youtube videos on the proper technique) and leave it to cure with the layer.
The next day add your final layer on top of the glitter or flake to cure and seal the floor. You usually need to wait around 5-7 days before it is ready to be used (check with the manufacturer).
Then all that is left is for you to do is stand back, and marvel at your fresh, clean, and durable garage floor.
Maintaining Epoxy Coating Garage Flooring
Epoxy coating is one of the most durable materials for flooring in the world. But even tough flooring like this needs a little bit of care and attention. Here are our top 5 tips for maintaining epoxy garage flooring to keep it looking as good as new.
- Clean up spills ASAP
This first tip isn’t really about maintaining your flooring, it’s about maintaining your health. Unless you decided to mix sand in with your Epoxy when you were installing it – your floor is going to be super slippery when it is wet. Clean up all spills (regardless of how small they are) as soon as you notice them.
- It’s not indestructible
Despite how strong Epoxy is, it were not indestructible and repeated rubbing from hard (metal) objects can seriously damage the appearance of your floor. Any loose nuts or bolts that can roll around under your feet should be picked up immediately. Scratch marks are easily noticeable on a super smooth Epoxy floor.
- Weekly Mopping
We know 90% of you won’t do this, because who really wants to mop their garage every week. This is not an essential tip, and your Epoxy flooring will not structurally degrade if you don’t mop it. But if you want it to stay looking as good as new. Give it a little mop as often as possible. It will help the floor keep its beautiful shine for longer.
- Provide Padding
Epoxy is strong stuff, but you should protect it from small points of high pressure. This is mainly going to be things like motorcycle kickstands and car jacks. Get a mouse mat or a piece of plywood to protect the floor from cracking or denting under pressure.
- Don’t Use Acidic Cleaners
Some garage floor cleaners are designed to be super strong and abrasive to remove thick oil and chemical stains that can often appear. These cleaners are occasionally acidic. Your floor should be able to withstand accidental acidic spills without being damaged, but you should avoid intentionally cleaning it with acidic cleaner. It will remove the shine of the floor, and it becomes very slippery If the floor gets wet.
Final Thoughts
So there you have it, probably the world’s most in-depth review of epoxy coating for garage floors. We feel that we have given a good sample of all the different options and price points you will have available to you in this article.
We highly recommend you go for a colored option if you don’t have a brand new concrete floor. The smallest imperfections will be with you until you move out if they are covered in epoxy. In the vast majority of cases where people do this, they wish they had gone for a pigmented option.
That being said, if you have a fresh and new concrete floor, then the glossy clear coat option can be a beautiful effect when done correctly. (Just remember that you need to let fresh concrete air out for over 60 days before you seal it with epoxy).
As you probably already know, we highly recommend you go wild with the floor of your garage. It’s the one place you can go crazy with the décor and still be happy with the result whatever happens. As such, we advise you to use metallic flakes liberally.